Preview and Create Invoices
1. The Preview Invoice function allows users to previous what the invoice will look like prior to creating it in IDLS. This provides users the opportunity to review stops totals, accessorials, and details to catch any missed revenue and to prevent overbilling so that an accurate invoice is created the first time.
2. The Create Invoice function actually creates the invoice in the system, but follows all of the same steps as below.
NOTE: However, do not confuse this with an actual invoice. This only shows you the data, it does not commit it to an invoice, so the next time you create an invoice, you'll have two periods worth on the one form. Users must create an invoice to commit that into the IDLS system for your organization.
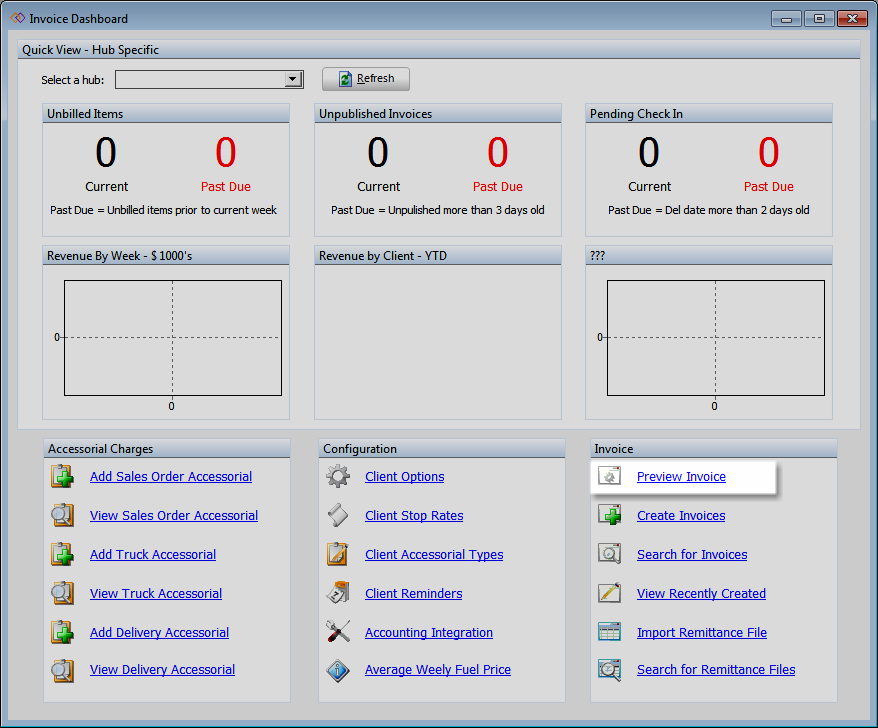
From the Invoice Dashboard, click on the "Preview Invoice" link (or the "Create Invoice" link to create the invoice and commit it to the system).
|
|
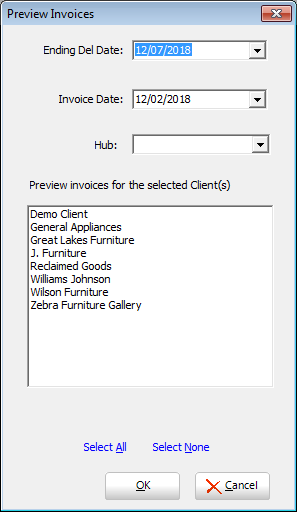
Ending Del Date: This is the last delivery date that will be included on the invoice. The invoice preview will begin its calculations starting the first day after or following the previous period's "Ending Del Date". Example: Your hub has a fiscal week of Saturday to Friday. Your "Ending Del Date" would be the Friday date ending your invoice period. If your previous invoice's "Ending Del Date" was 8/31/2018, then your next invoice's "Ending Del Date" would be 9/7/2018 covering deliveries that occurred 9/1/2018 to 9/7/2018 (7 days of work). Invoice Date: Typically, this is the date the invoice was created, but can be changed to suit your organization's fiscal policies or to amend mistakes. Hub: The hub for which the invoice is to be prepared. Client: Select the client to which the invoice will apply. |
Next, an invoice reminder's dialog box will pop-up. This is simply a reminder window--example would be to charge for space or deduct for losses.
The system will then check for any errors such as rate calculation errors, missing (yet, required) POD images, and more.
Once the process is complete, there is a graphical view of the invoice with the ability to navigate the invoice details.
- Client Name
- Week Ending Date
- Invoice Number
- Invoice Date
- Address
- Summary
- Stop Details
- Sales Order Accessorials
- Truck Accessorials
- Delivery Accessorials
- Load Details
- Occupancy Details
- Stock Receipt Details
From this view, users can close the window, print the invoice, and export the file.