Routing
The Routing Manager may be used to make mass changes, and edit all future deliveries at one time.
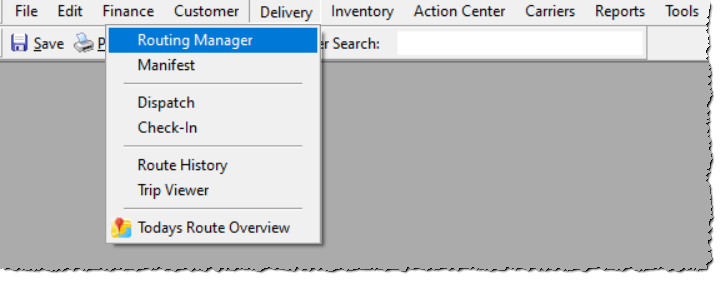
To open the routing manager, select the "Delivery" menu and choose "Routing Manager".
|
|
|
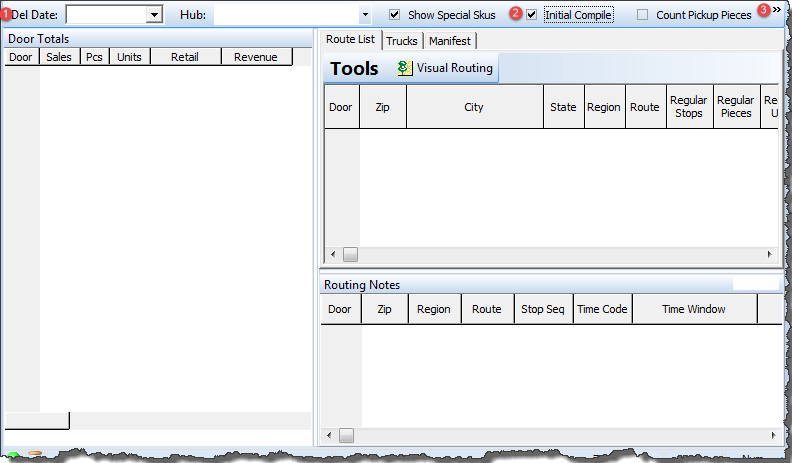
1. Select the Delivery Date you wish to view or edit the routes for the scheduled orders. 2. Select the appropriate hub (IDLS supports multiple locations). 3. Optional. Click on "Options" to refine, change, and/or reset your search/routing options to fit your needs (i.e. show orders and route by select client(s), service level(s), merchandise category, etc.) 4. After the above steps have been completed, click on "Compile" to get started. |

|
|
|
1) To add a route to an order, select a delivery date and a hub from the menus at the top of the page. If "Options" is selected, the same menu detailed in "Searching">"Search Options" will appear and allow the user to refine the search. 2) If there have been many changes to routes, selecting "Initial Compile" will clear all previous routing settings and allow the user to start from the beginning. 3) To show search results, click on the double-arrow sign on the far right at the top of the page, and select "Compile". Select the order to be routed. |
After compiling the route for the first time (or using the "Initial Compile" setting), the user has two summaries available:
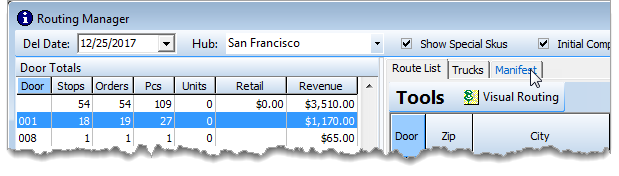
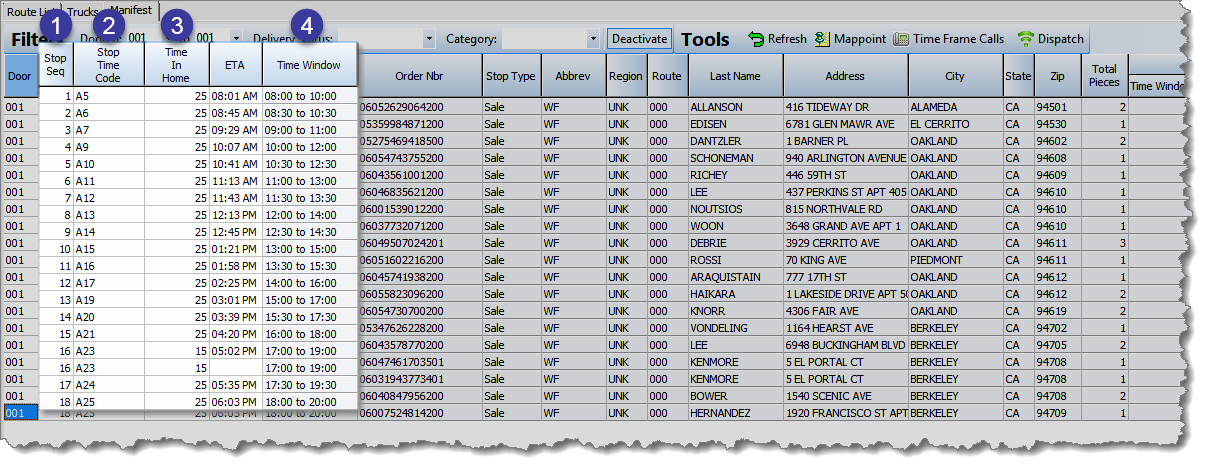
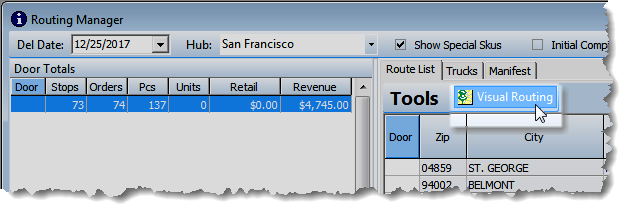
1. Door Summary(ies) - In this example you'll see that there are no doors assigned to any orders so this is an overview or summary of the scheduled orders for the specified delivery date. Summary totals (by door, if assigned) include nunber of stops, number of orders (one stop may have multiple orders attached), number of pieces, number of units, total retail dollar amount, and revenue. Note that viewing this information is based on permissions set for that user.
2. Door & Zip Code Summary(ies) - Again, in this example no doors have been assigned, so the zip code will not have a door label next to it (Note that if more than one door is going to a zip code, that zip code will be displayed to match the associated door(s) and display the relevant information to the right).
Additional information displayed to the right of the door label(s) includes zip codes, "City", two-digit "State", user defined "Region" code, user-defined "Route" code, "Regular" stop information breakdown(s), "Premium" stop information breakdown(s), and the sum of those listed under the "Total" section with additional infomration regarding the "Retail" dollar amount and Revenue for that door/zip code combination.
Beware of any revenue that ends in "$.01" - this is often a way to track down invoice errors before they happen. It less likely that a percent (%) of retail stop rate end in $.01 (for example "$123.01", so, if you see a total ending in $.01 look deeper to see if an order is estimated to invoice at $.01 and make corrections as necessary to avoid invoice errors.

Initial Visual Routing:
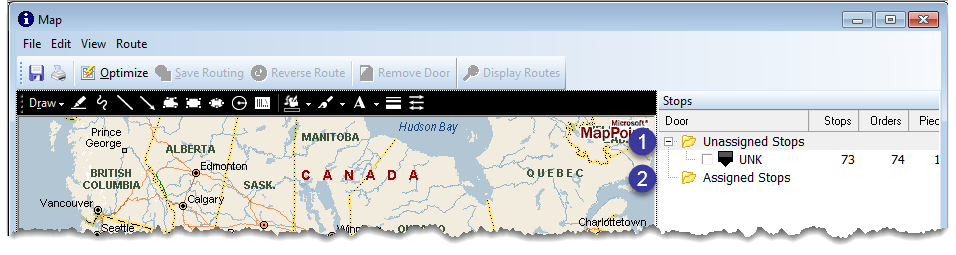
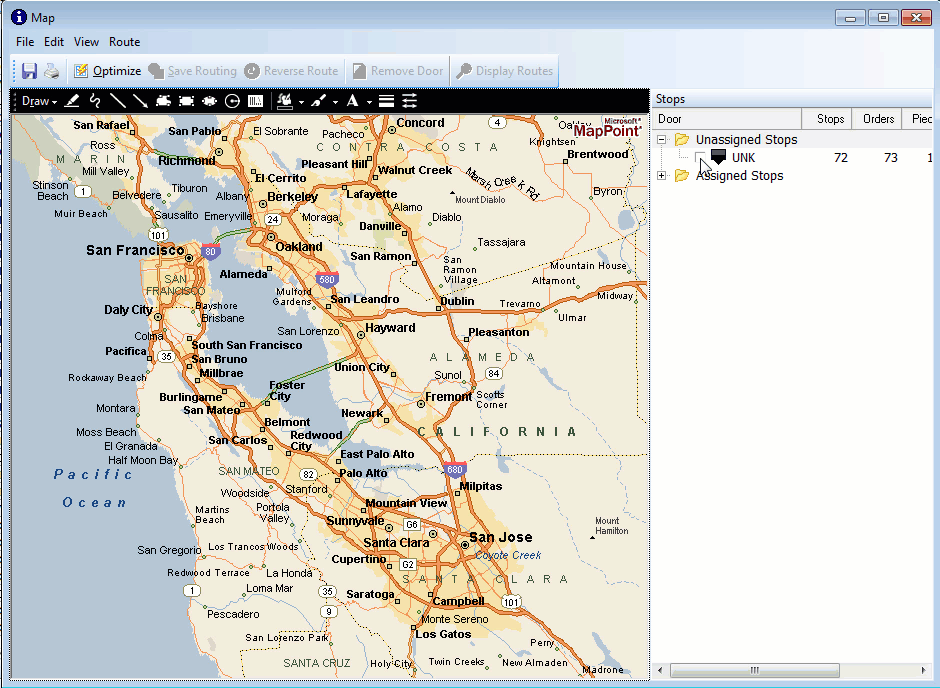
1. Unassigned Stops - After the initial compiling, all of the user's stops will be summarized here by user-defined regions (in this example, all stops are listed under the region "UNK").
2. Assigned Stops - Once stops are sorted into "Doors" the route summaries separated by "Door" Will be listed here.
Listed to the right of these respective groups are the summaries of "Stops", "Orders", "Pieces", "Units", and "Retail".